





To do this, we assume you have:
A live WordPress website
A Google Analytics account
Access to your web hosting control panel (in our case, Infomaniak)
1. Creating the property and tracking ID in Google Analytics
First, we create the property for your new website. Go to Analytics.Google.com and sign in.
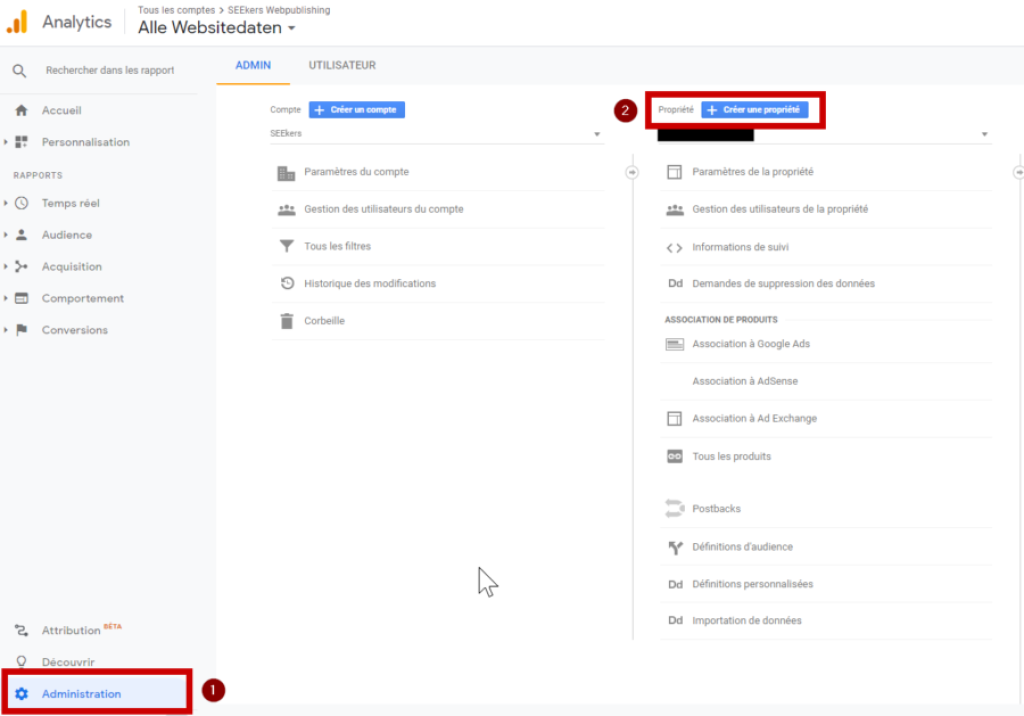
Then click the admin button at the bottom left of your screen, followed by "Create property" at the top right.
Next, select "Web" and continue:

Finally, fill in the property details (your website name, URL, category and the time zone for your reports):
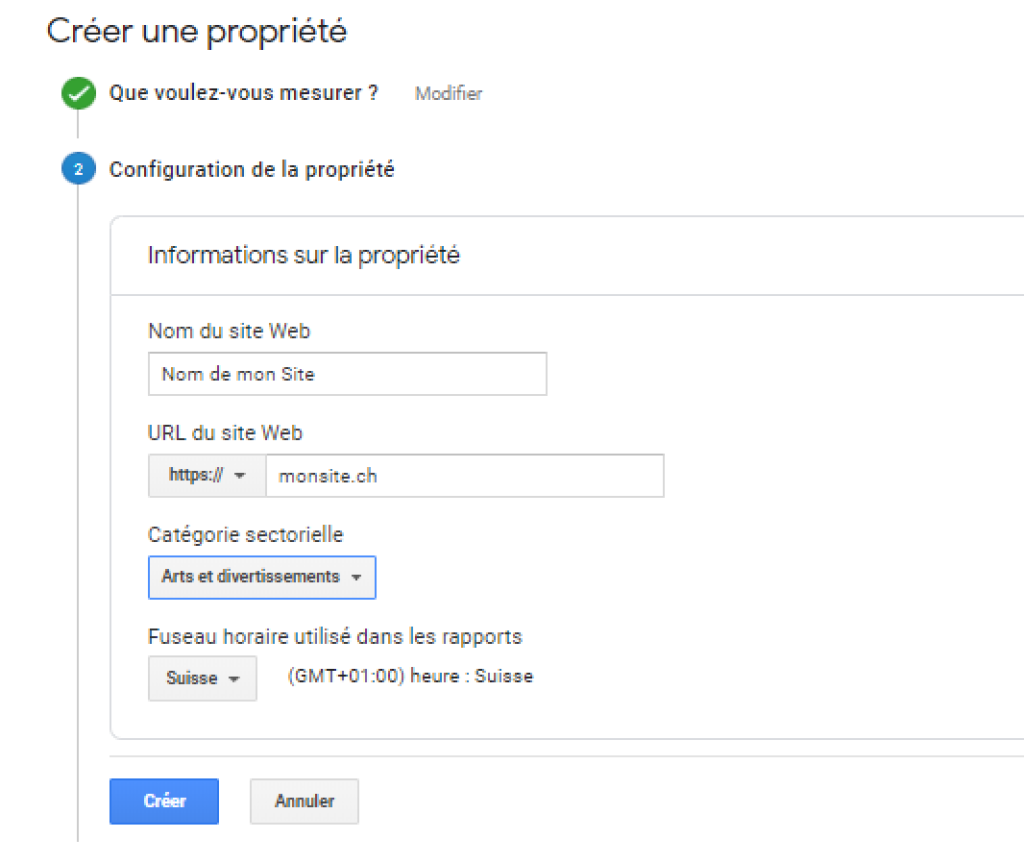
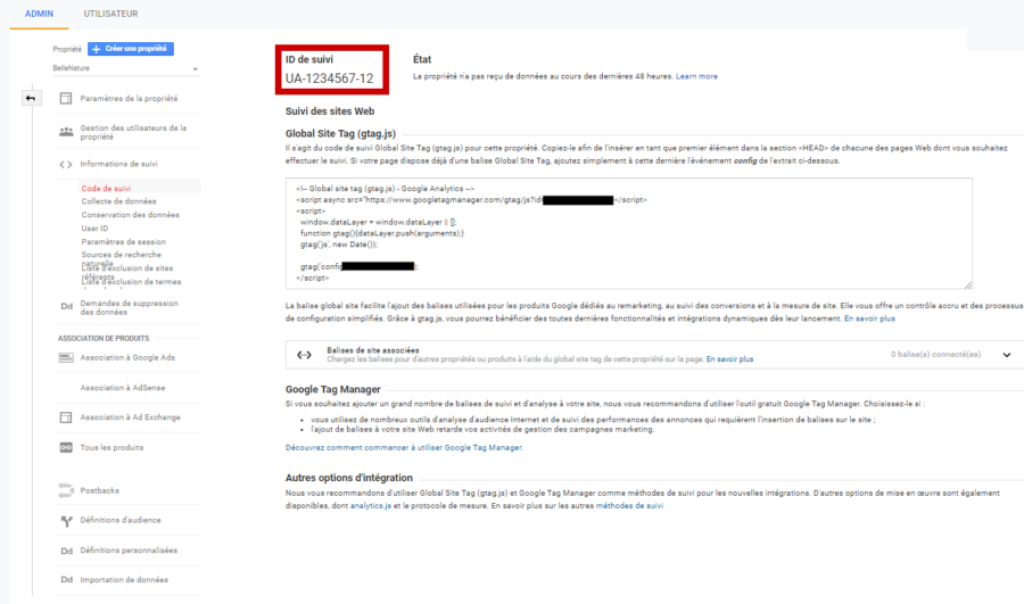
After clicking "Create", you'll land on the admin page of your new property. Well done!
Make a note of the tracking ID at the top of the page: this is the code we'll add to your WordPress site later in this article to count and track your visitors.
2. Installing it on WordPress
Now go to WordPress. In this section, we'll install a plugin that adds the Google Analytics tracking code.
You can also do this without a plugin. Simply copy the script shown below the tracking code between the head tags of your site.

In the plugin search, type "Google Analytics" and you'll find dozens of different plugins. Choose the one that suits you best. In our case, we simply want a plugin that adds the tracking code to our site, not a dashboard inside WordPress, so we chose this plugin:
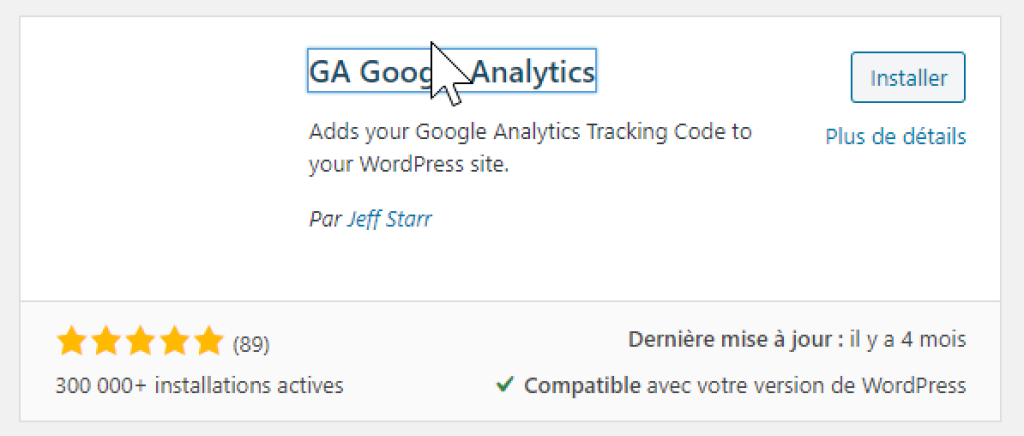
https://wordpress.org/plugins/ga-google-analytics/
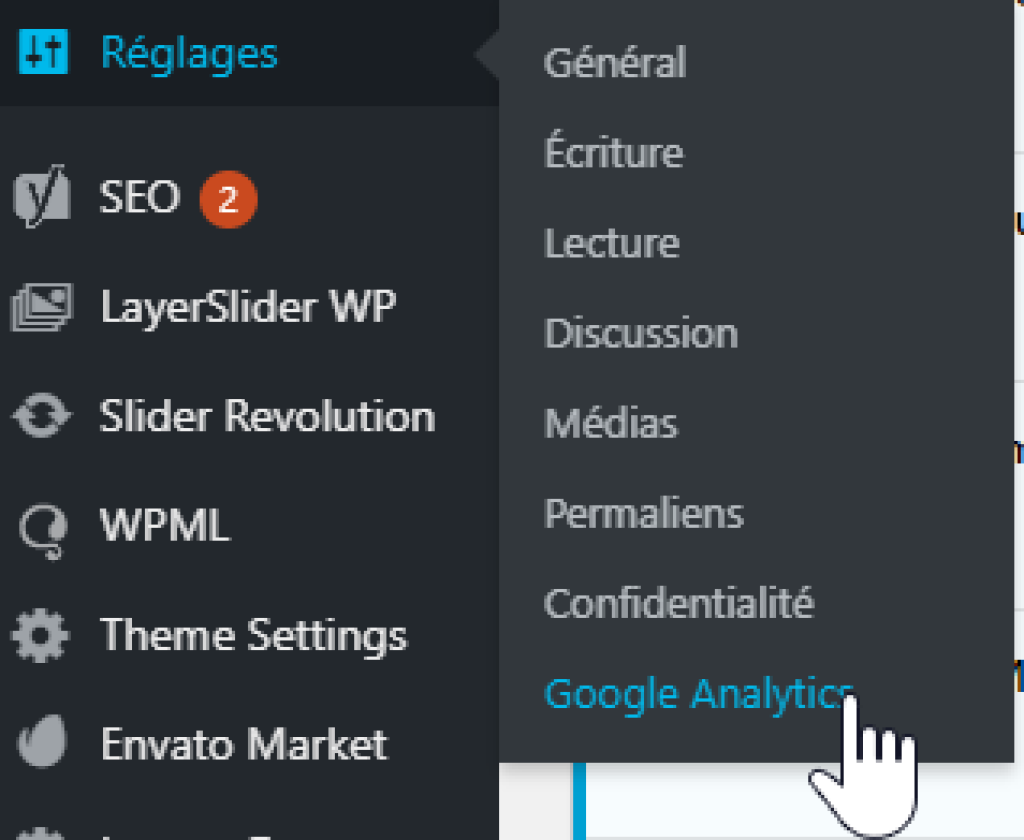
Click Install and activate your new plugin. You can then open its settings under "Settings" then "Google Analytics":
In the settings, click the "Plugin Settings" tab. Here you can add the tracking code we prepared in section 1 of this tutorial and set the tracking options.
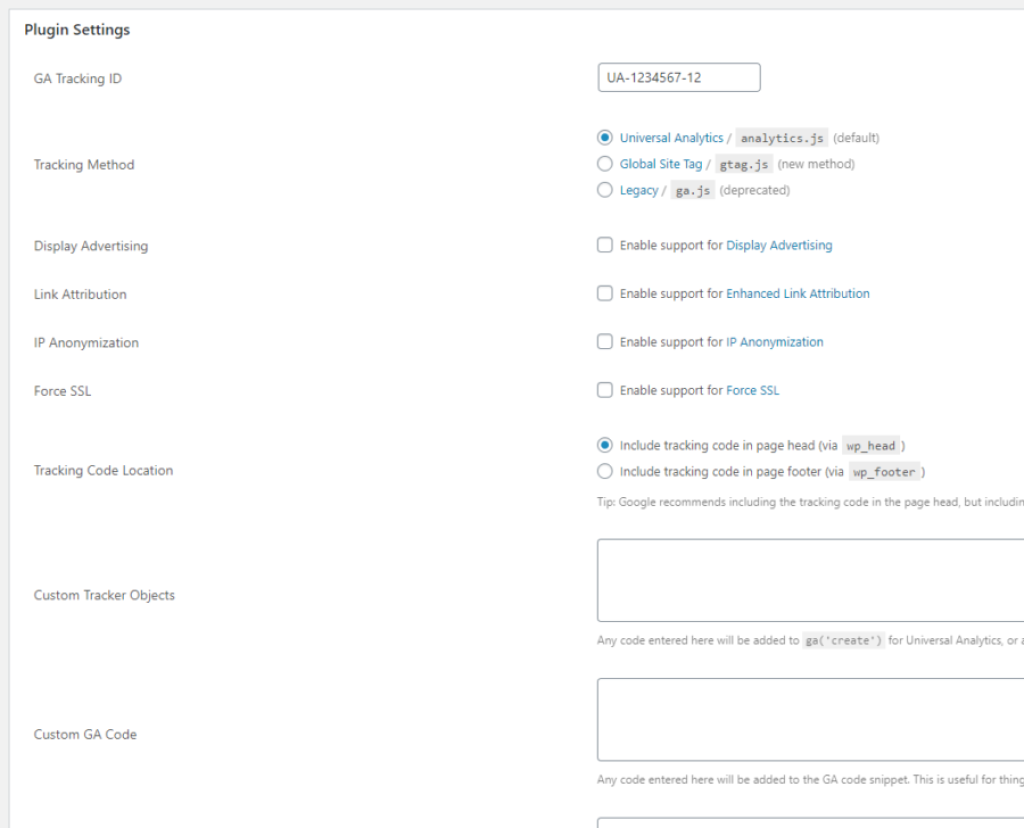
If you don't want administrators to be included in your statistics, tick "Disable tracking of Admin-level users" at the very bottom of these settings.
Now click "Save changes", and you're done! Your site will now track all your visitors and how they behave on your pages.
3. Testing the setup
Testing your tracking code couldn't be easier! Log out of your site (if you ticked "Disable tracking of Admin-level users") and visit its home page.
Then go to Google Analytics and open the home screen: you should see one visitor in the real-time report (spoiler: it's you).

The setup worked. All that's left is to analyse your visitors' behaviour and take the right steps to optimise your site. That will be the topic of a future blog post.
Still have questions, or would you like a quote for setting up tracking on your website? Get in touch today!