





This option can be very handy in your organisation, for example if your company does not use Microsoft Exchange.
It lets you set sharing options (whether a person can edit your calendar or not), see your colleagues' calendars and give them access to yours.
We assume that you and your colleagues all have an email account at Infomaniak and access your emails through the Workspace (workspace.infomaniak.com). If not, start by creating them: Email hosting at Infomaniak
1. Create the calendars on Infomaniak
Go to https://ksuite.infomaniak.com/calendar from your account and create a new calendar by clicking the "+" button in the left-hand menu.

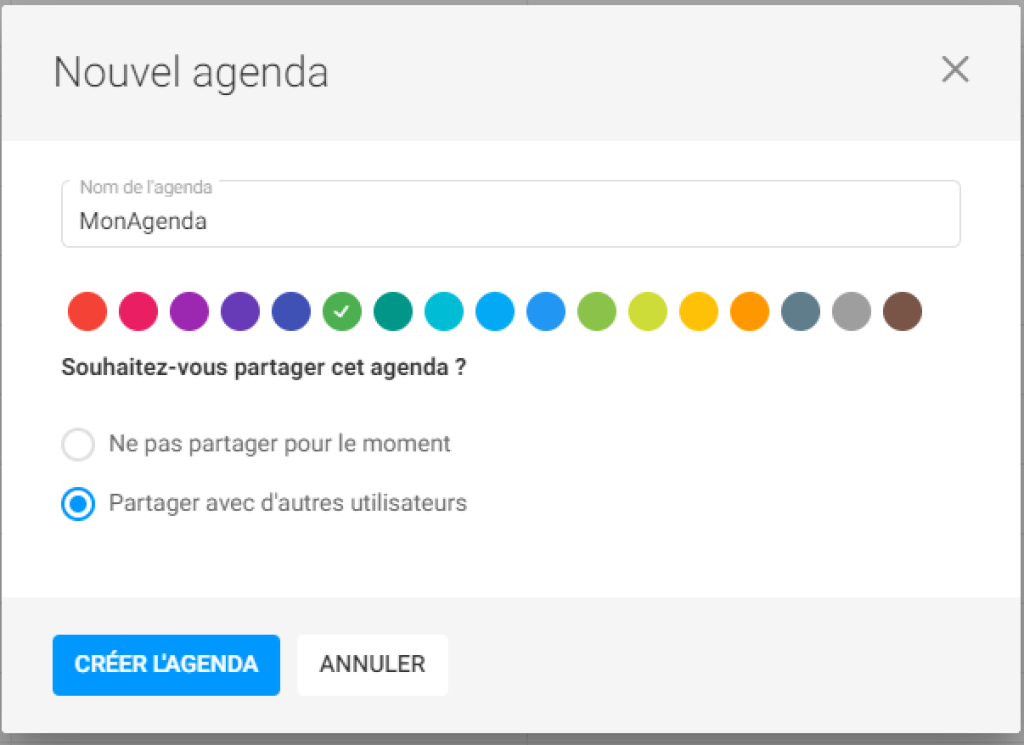
Give your calendar a name and a colour, then select "Share with other users".
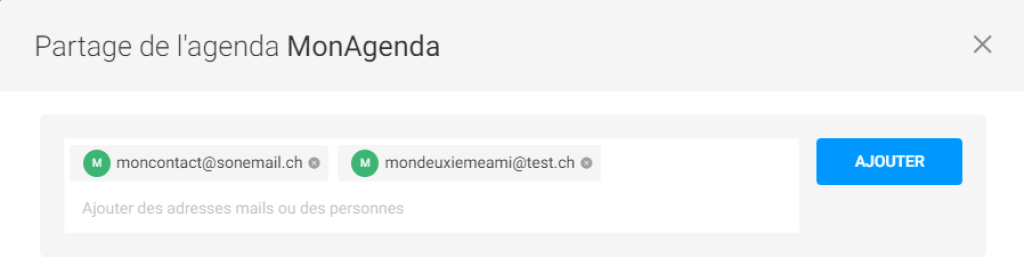
Add the email addresses of your colleagues or friends (their Infomaniak addresses), then click "Add".
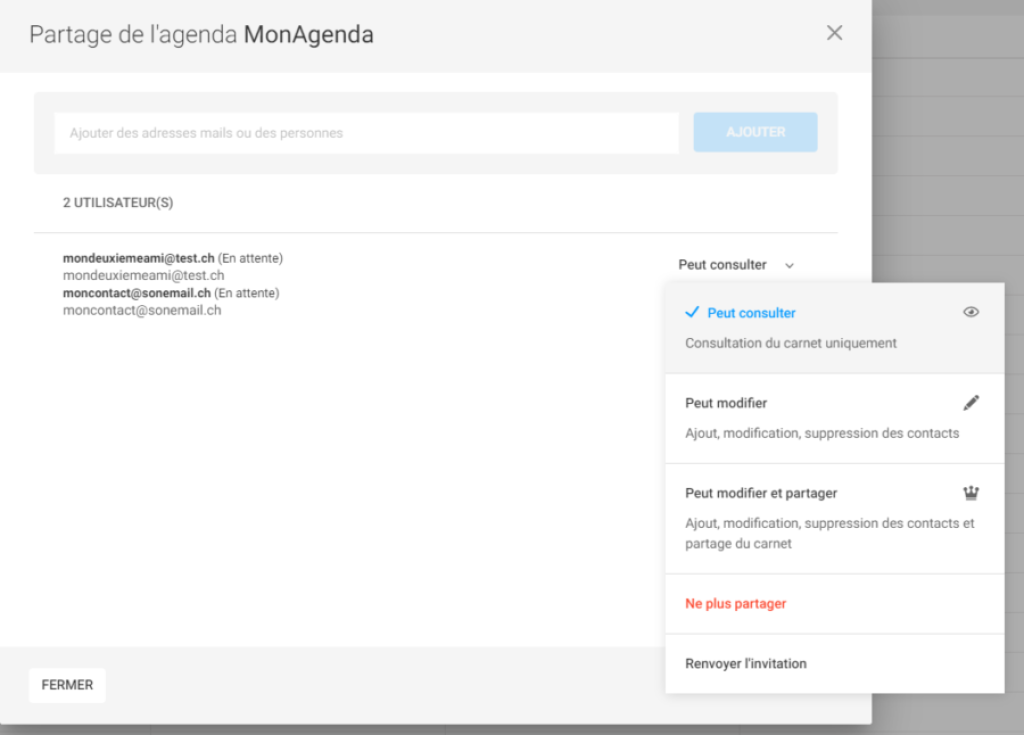
Then set the rights each contact will have on your calendar:
Can view
Can edit
Can edit and share
From this menu you can also cancel the invitation ("Stop sharing") or resend the invitation link if the person did not receive it.
Your contacts will receive an email with a link to accept the invitation and add your calendar to their calendar.infomaniak.com page.
Then ask your colleagues to do the same so you can access their calendars. It is easier to do this at the start than to come back to it later.
2. Add the calendars to Outlook for Windows
Now that the calendars are shared, it's time to add them to your email client. In our example, we'll use Outlook for Windows.
Out of the box, Outlook cannot sync web calendars the way it does with an Exchange server. So we need to download an Outlook plugin that handles two-way synchronisation.
Download the "CalDav Synchronizer" plugin from its website and install it on your computer. Once installed, restart Outlook and a new menu should appear.
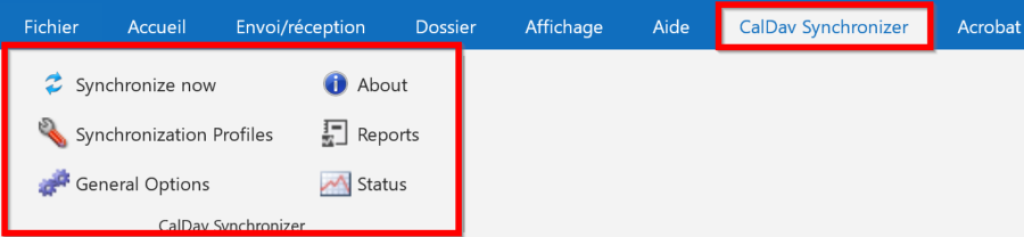
Click "Synchronization Profiles" to add the calendars.
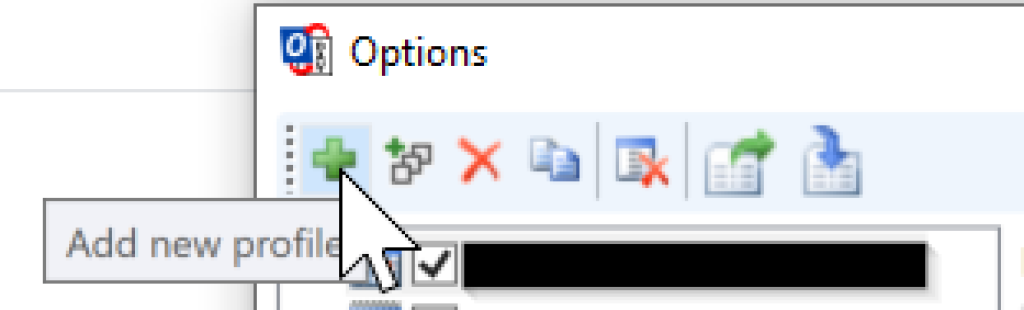
Then click the "+" button to add a profile.
Select "Generic CalDav/CardDav" and click "Ok".

With these first options chosen, you reach the profile creation menu.
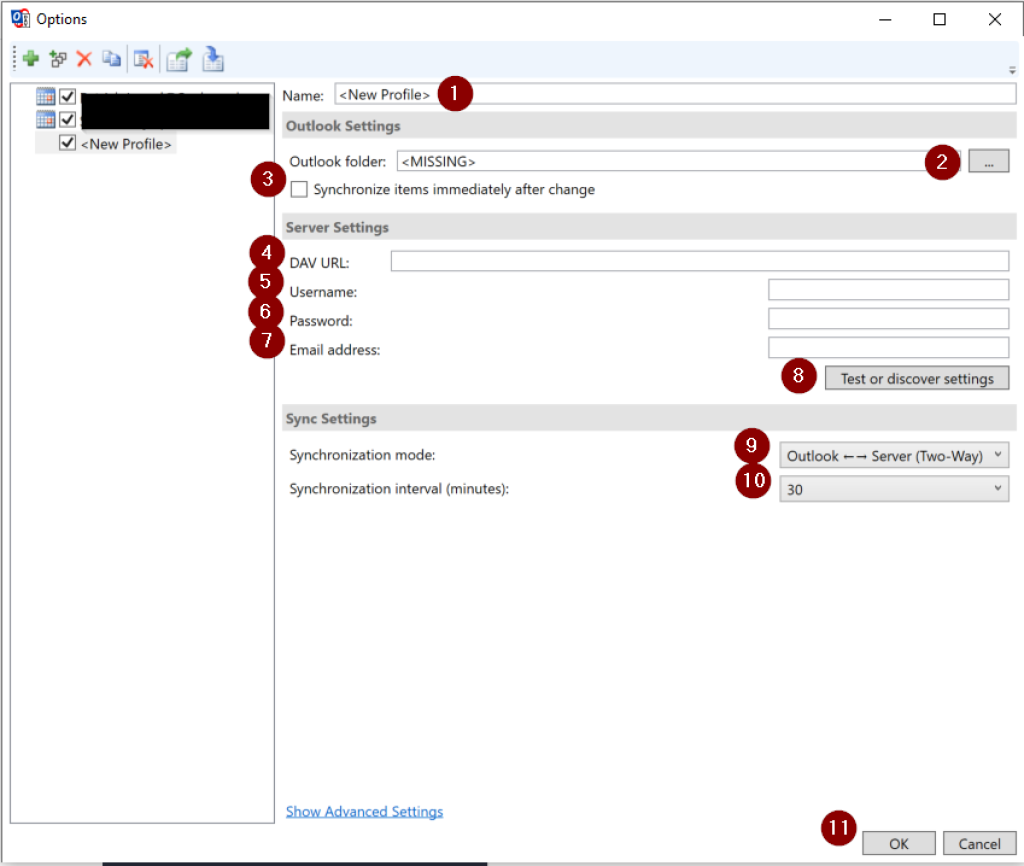
Let's go through the fields one by one:
1) Name: choose a name for your sync profile. Something meaningful (for example your email address).
2) Outlook Folder: choose where your calendar will be saved by clicking the "…" on the right (2). In this menu, go to "Internet Calendars" (1), click "New" (2) and enter a name (for example your email address) (3). Then select "Calendar Items" (4) and click "Ok" (5).

3) Synchronize items immediately after change: tick this if you want every change to trigger a sync.
4) DAV URL: enter the URL "sync.infomaniak.com".
5) Username: you can find your username in the left-hand menu under "Synchronisation assistant", then by choosing "My contacts & calendars" -> "On my computer" -> "Windows".


6) Password: the one you use to log in to calendar.infomaniak.com.
7) Email address: the email address linked to this calendar account.
8) Then click "Test & Discovery". This checks that the connection works and lets you select the calendar(s) to sync.
9) Synchronization mode: keep the default option if you want to sync both ways (computer to server and back).
10) Synchronization interval (minutes): choose the delay between two syncs.
You can then click "Ok" to confirm the profile. And that's it!
If everything went well, you can now see the calendars shared with you in Outlook's calendar tab.
3. Sync your colleagues' calendars on Android or iPhone
On Android and iPhone, syncing is a little simpler. All you need is the "Infomaniak Sync" app, available in the app stores or at this link.
Open the app on your phone and enter your Workspace credentials (the ones you use to log in to https://ksuite.infomaniak.com/calendar).
Select the calendars you want to sync.
Start syncing by tapping the icon at the bottom right of your screen.
That's it! Your calendars are now shared and available on your Android device or iPhone.
We recommend using Google's "Calendar" app to view these calendars, as it handles this type of synced calendar quickly and easily.
Still have questions about syncing, or would you like to get in touch for more information? Visit our contact page and write to us!